Privy Wallet on Fuse
How to use Privy.io on Fuse Blockchain
Introduction
This tutorial will walk us through creating a Smart Contract Account using the Privy Library. The provided code example demonstrates how to set up and interact with the Library to create a Smart Contract Wallet. This Smart Contract Wallet will be capable of executing User Operations (transactions) according to the ERC-4337 Standard on the Fuse Blockchain.
Privy is a simple library to add beautiful authentication flows and robust embedded wallets to your app.
Prerequisites
Before we begin, ensure you have the following:
- Node.js installed on your machine. You can download it from here.
- Code Editor: Use your preferred code editor; VS Code is recommended.
- An EOA wallet with a private key. You can use an existing one from MetaMask or create a new wallet.
- Basic Understanding of JavaScript and ReactJS: Familiarity with JavaScript will be helpful.
Step 1: Set Up Your Project
Create a new project folder and initialize it using Node.js:
mkdir new-project && cc new-project
npm init -y
Start a new ReactJS project using create-react-app
npx create-react-app fuse-privy-demo
Install the Privy and Viem packages:
npm install @privy-io/react-auth viem
Viem is a lightweight library with composable, and type-safe modules that interface with Ethereum.
Step 2: Code
After installing the Privy package, we will include it in the index.js file to make it available throughout the application. Update the index.js file.
import { PrivyProvider } from "@privy-io/react-auth";
import { fuse } from "viem/chains";

…
<React.StrictMode>
    <PrivyProvider
      appId={process.env.REACT_APP_PRIVY_APP_ID}
      onSuccess={(user) => console.log(`User ${user.id} logged in!`)}
      config={{
        defaultChain: fuse,
        supportedChains: [polygon],
        loginMethods: [ "wallet"],
        embeddedWallets: {
          createOnLogin: "users-without-wallets", // or 'all-users'
        },
      }}
    >
      <App />
    </PrivyProvider>
  </React.StrictMode>
The PrivyProvider has the following properties:
appId = Provided by Privy
onSuccess callback which will execute once a user successfully logs in. It is an optional argument
createPrivyWalletOnLogin = A boolean to configure whether you'd like your users to create embedded wallets when logging in. It is an optional argument
config = To customize the onboarding experience.
In this example, the config is set up for the defaultChain, loginMethods and embeddedWallets
The loginMethod we have selected is to use a “Wallet” Login experience.
Open the App.js file and replace the default content with the following code:
import "./App.css";
import { usePrivy } from "@privy-io/react-auth";

function App() {
  const { ready, authenticated, user, login, logout } = usePrivy();

  // Wait until the Privy client is ready before taking any actions
  if (!ready) {
    return null;
  }

  return (
    <div className="App">
      <header className="App-header">
        {/* If the user is not authenticated, show a login button */}
        {/* If the user is authenticated, show the user object and a logout button */}
        {ready && authenticated ? (
          <div>
            <textarea
              readOnly
              value={JSON.stringify(user, null, 2)}
              style={{ width: "600px", height: "250px", borderRadius: "6px" }}
            />
            <br />
            <button
              onClick={logout}
              style={{
                marginTop: "20px",
                padding: "12px",
                backgroundColor: "#069478",
                color: "#FFF",
                border: "none",
                borderRadius: "6px",
              }}
            >
              Log Out
            </button>
          </div>
        ) : (
          <button
            onClick={login}
            style={{
              padding: "12px",
              backgroundColor: "#069478",
              color: "#FFF",
              border: "none",
              borderRadius: "6px",
            }}
          >
            Log In
          </button>
        )}
      </header>
    </div>
  );
}

export default App;
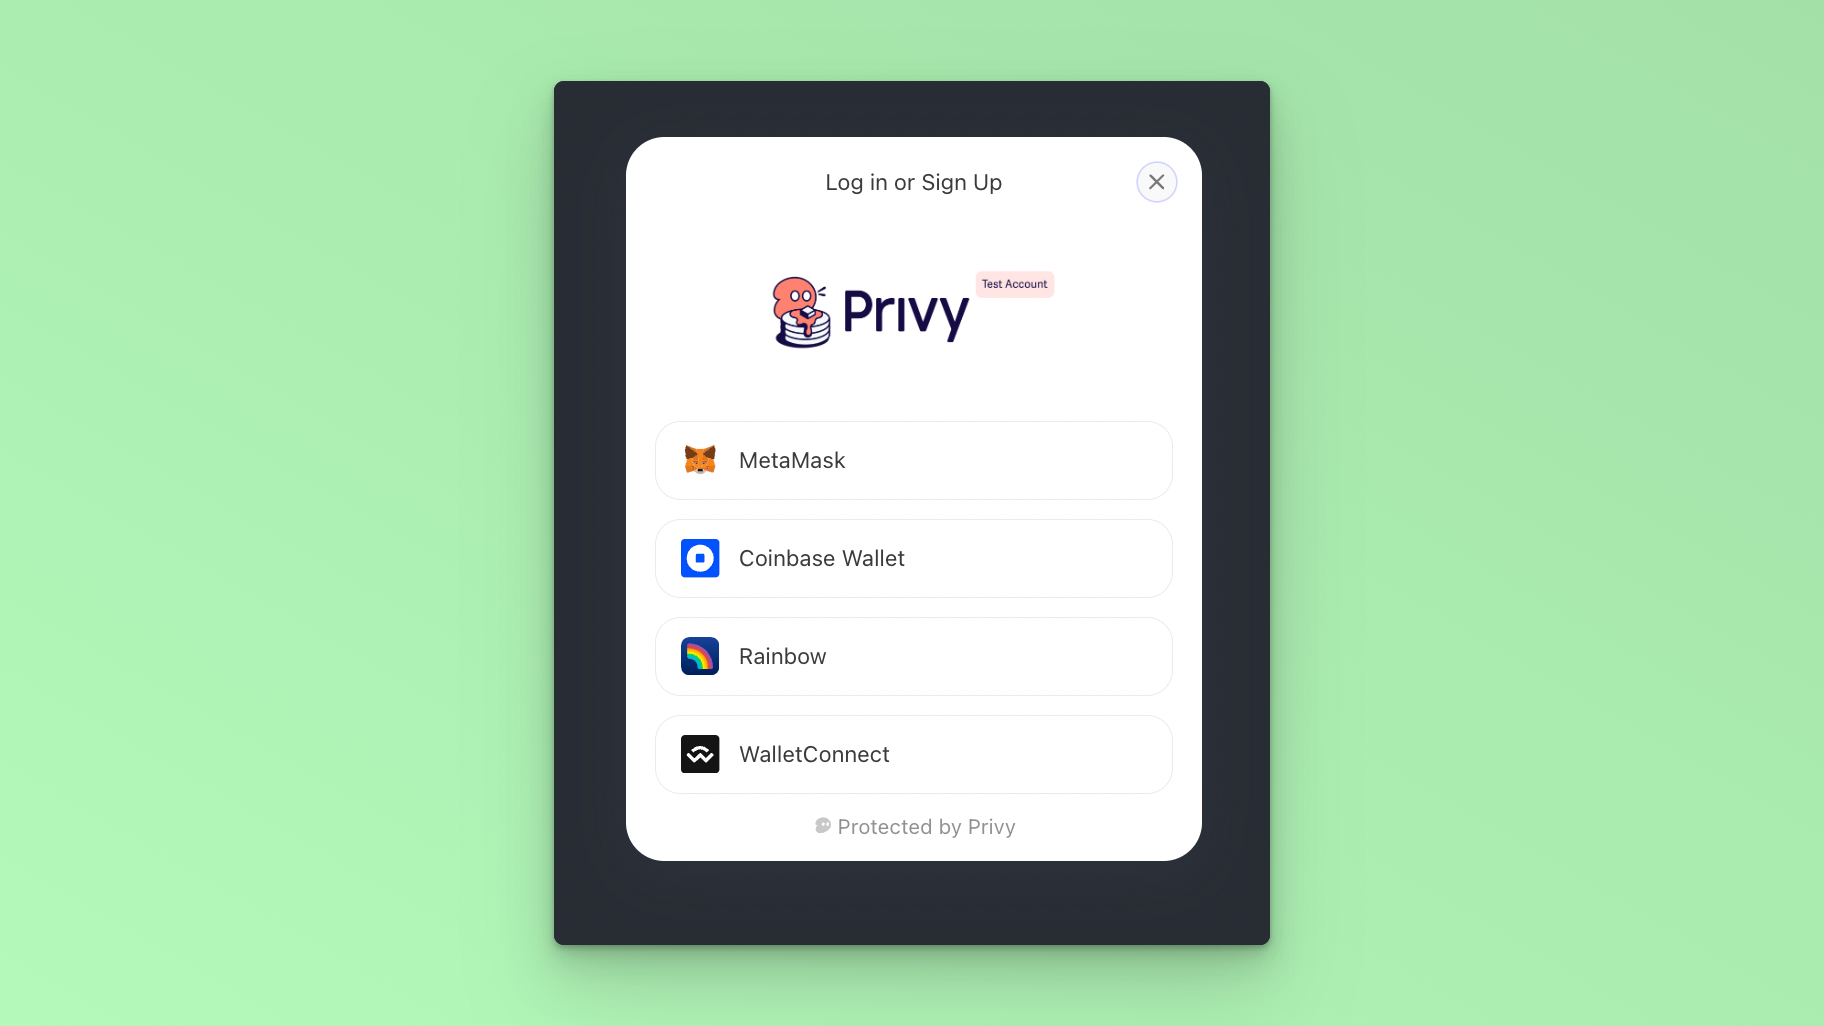
Run the command npm start to view your app in localhost:3000 When you click on login The app looks like this:
Code Breakdown:
Importing Dependencies:
import "./App.css";
import { usePrivy } from "@privy-io/react-auth";
The code begins by importing the necessary styles and the
usePrivyhook from the Privy.io library.Defining the App Component:
function App() {}The
Appcomponent is the main component of your React application where the authentication logic will be implemented.Initializing Privy Variables:
const { ready, authenticated, user, login, logout } = usePrivy();
The usePrivy hook returns an object with properties like ready, authenticated, user, login, and logout. These variables will be used to manage the authentication state and user information.
Waiting for Privy Client to be Ready:
if (!ready) {
  return null;
}
This conditional check ensures that the Privy client is ready before taking any actions. If not ready, the component returns
null.Rendering the UI:
return (
 <div className="App">
   <header className="App-header">
The main UI structure of the React component is defined within the
returnstatement.Conditional Rendering Based on Authentication State:
{ready && authenticated ? (
  // Authenticated User UI
) : (
  // Unauthenticated User UI
)}
Depending on whether the user is authenticated or not, different UI elements are rendered. If authenticated, the user details and a logout button are displayed; otherwise, a login button is shown.
Authenticated User UI:
<div>
  <textarea
    readOnly
    value={JSON.stringify(user, null, 2)}
    style={{ width: "600px", height: "250px", borderRadius: "6px" }}
  />
  <br />
  <button
    onClick={logout}
    style={{
      marginTop: "20px",
      padding: "12px",
      backgroundColor: "#069478",
      color: "#FFF",
      border: "none",
      borderRadius: "6px",
    }}
  >
    Log Out
  </button>
</div>
This section displays a textarea with the JSON representation of the user object and a logout button. Clicking the logout button triggers the
logoutfunction.Unauthenticated User UI:
<button
  onClick={login}
  style={{
    padding: "12px",
    backgroundColor: "#069478",
    color: "#FFF",
    border: "none",
    borderRadius: "6px",
  }}
>
  Log In
</button>
If the user is not authenticated, a login button is displayed. Clicking the login button triggers the
loginfunction.
Conclusion:
Following this breakdown, developers can better understand how to integrate Privy.io for authentication in their React applications. This example provides a foundation for building secure and user-friendly authentication workflows for Account Abstraction applications deployed on the Fuse Blockchain.